반응형
import
In [ ]:
import tensorflow as tf  # tensorflow
import tensorflow_hub as tfhub  # tensorflow hub
Data
In [ ]:
# 샘플 이미지 다운로드
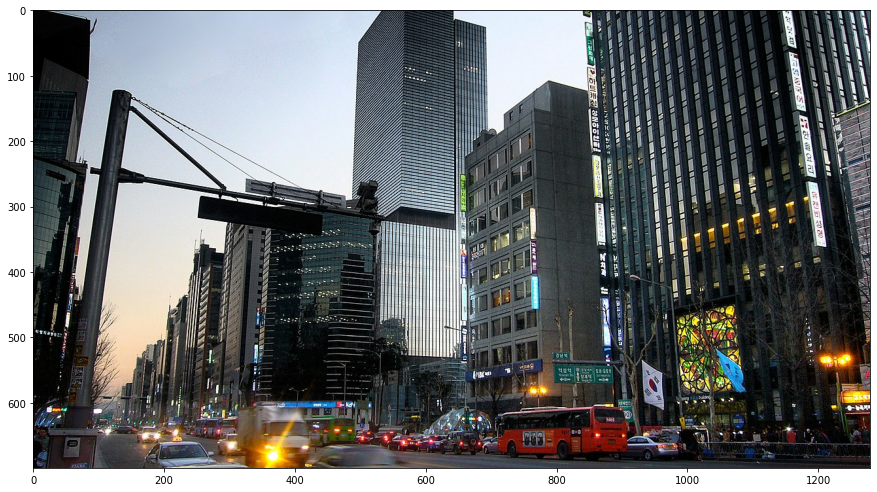
# 위키디피아에서 제공하는 강남 지역의 거리 사진을 다운로드 후, 모델의 입력 형태에 맞게 전처리

img_path = 'https://upload.wikimedia.org/wikipedia/commons/thumb/c/c4/Gangnam_Seoul_January_2009.jpg/1280px-Gangnam_Seoul_January_2009.jpg'
img = tf.keras.utils.get_file(fname='gangnam', origin=img_path)
img = tf.io.read_file(img)   # 파일 객체를 string으로 변환
img = tf.image.decode_jpeg(img, channels=3)   # 문자(string)를 숫자(unit8) 텐서로 변환
img = tf.image.convert_image_dtype(img, tf.float32)   # 0 ~ 1 범위로 정규화

import matplotlib.pylab as plt
plt.figure(figsize=(15, 10))
plt.imshow(img)
Downloading data from https://upload.wikimedia.org/wikipedia/commons/thumb/c/c4/Gangnam_Seoul_January_2009.jpg/1280px-Gangnam_Seoul_January_2009.jpg
344064/336122 [==============================] - 0s 0us/step
352256/336122 [===============================] - 0s 0us/step
Out[ ]:
<matplotlib.image.AxesImage at 0x7fe41a9a35d0>
In [ ]:
# 사전학습 모델은 배치 크기를 포함하여 4차원 텐서를 입력 받는다
# 따라서 가장 앞쪽으로 0번 축(axis 0)으로 새로운 축을 추가
img_input = tf.expand_dims(img, 0)  # batch_size 추가
img_input.shape
Out[ ]:
TensorShape([1, 700, 1280, 3])Model
In [ ]:
# 텐서플로 허브에서 Open Images v4 데이터셋으로 사전 학습된 2가지 모델을 제공
# https://tfhub.dev/s?dataset=openimagesv4

# Faster R-CNN 알고리즘으로 구현된 모델 사용. mobilenet_v2 보다 속도는 느리지만 정확도는 훨씬 높다.

# TensorFlow Hub에서 모델 가져오기 - FasterRCNN+InceptionResNet V2
# https://tfhub.dev/google/faster_rcnn/openimages_v4/inception_resnet_v2/1
# 복사한 링크를 텐서플로 허브 라이브러리의 load 함수에 전달하여 모델을 불러온다
model = tfhub.load("https://tfhub.dev/google/faster_rcnn/openimages_v4/inception_resnet_v2/1")
INFO:tensorflow:Saver not created because there are no variables in the graph to restore
INFO:tensorflow:Saver not created because there are no variables in the graph to restore
In [ ]:
# 모델 시그니처(용도) 확인
# 이 모델은 'default' 시그니처 하나만 제공
model.signatures.keys()
Out[ ]:
KeysView(_SignatureMap({'default': <ConcreteFunction pruned(images) at 0x7FE37BE7DD50>}))In [ ]:
# 객체탐지 모델 생성
# 모델에서 'default' 시그니쳐를 지정하여 객체 탐지 모델 인스턴스 생성
obj_detector = model.signatures['default']
obj_detector
Out[ ]:
<ConcreteFunction pruned(images) at 0x7FE37BE7DD50>In [ ]:
# 객체 탐지 모델에 미리 전처리를 통하여 준비한 샘플 이미지를 입력
# 모델은 추론(inference)을 거쳐서 예측 값을 반환
# result 변수의 딕셔너리 키 배열을 확인
In [ ]:
# 모델을 이용하여 예측 (추론)
result = obj_detector(img_input)
result.keys()
Out[ ]:
dict_keys(['detection_scores', 'detection_class_labels', 'detection_boxes', 'detection_class_entities', 'detection_class_names'])In [ ]:
# detection_boxes : 경계박스(bounging box) 좌표[ymin, xmin, ymax, xmax]
# detection_class_entities : 검출된 클래스 아이디
# detection_scores : 검출된 스코어
In [ ]:
# 탐지한 객체의 개수
# 검출된 스코어의 점수를 통해서 100 개의 객체를 탐지 한 것을 확인 가능
len(result["detection_scores"])
Out[ ]:
100시각화
In [ ]:
# 검출된 100개의 객체 중에서 검출 스코어가 0.1보다 큰 경우에만
# 경계박스와 예측 클래스를 시각화.
# 단, 최대 10개 객체만 표시되도록 설정
In [ ]:
# 객체 탐지 결과를 시각화
boxes = result["detection_boxes"]    # Bounding Box 좌표 예측값
labels = result["detection_class_entities"]   # 클래스 값
scores = result["detection_scores"]   # 신뢰도 (confidence)

# 샘플 이미지 가로 세로 크기
img_height, img_width = img.shape[0], img.shape[1]

# 탐지할 최대 객체의 수
obj_to_detect = 10

# 시각화
plt.figure(figsize=(15, 10))
for i in range(min(obj_to_detect, boxes.shape[0])):
    if scores[i] >= 0.2:
        (ymax, xmin, ymin, xmax) = (boxes[i][0]*img_height, boxes[i][1]*img_width,
                                    boxes[i][2]*img_height, boxes[i][3]*img_width)

        plt.imshow(img)
        plt.plot([xmin, xmax, xmax, xmin, xmin], [ymin, ymin, ymax, ymax, ymin],
                 color='yellow', linewidth=2)

        class_name = labels[i].numpy().decode('utf-8')
        infer_score = int(scores[i].numpy()*100)
        annotation = "{}: {}%".format(class_name, infer_score)
        plt.text(xmin+10, ymax+20, annotation,
                 color='white', backgroundcolor='blue', fontsize=10)

기본 Tensorflow R-Cnn 모델을 적용해 보았다.
'경기도 인공지능 개발 과정 > Python' 카테고리의 다른 글
| [Python] Image segmentation 실습 (1) | 2022.08.04 |
|---|---|
| [Python] Simple YoLo 실습 (2) | 2022.08.04 |
| [Ptyhon] 딥러닝 활성화 함수, 가중치 정리 (1) | 2022.07.26 |
| [Python] AIFB 강의(가입정보를 활용한 고객 데이터 분석) (0) | 2022.07.18 |
| [Python] 텐서플로 손실곡선, 드롭아웃, 모델저장 (0) | 2022.07.17 |